
How do you add an app to Google Play? With nearly 3 million apps, Google Play is huge. How did they get there?
Well, obviously, hundreds of thousands of app developers and aspiring entrepreneurs submitted them in hopes that hundreds of millions of Android device owners will download their app – making them fabulously famous and rich! Getting your app on Google Play is quite simple really.
With the right guide, especially one that covers some great App Store Optimization tips… you can have your app on Google Play, too!
It’s important to remember that adding an app to Google Play is only your first step in any marketing and distribution effort. We’ll talk more about that later.
To show you how to get your app on Google Play, we’ll be going screen-by-screen to make it easy to follow along. Extra instructions are included where necessary.
You will need the following items to add an app to Google Play:
- A (free) Google Account.
- A $25 registration fee for a Google Publisher Account.
- Your App Bundle or APK files.
- At least two high-quality screenshots of your app.
- A 512 x 512 pixel, 32-bit icon for your app.
Before jumping in, note that there are three major steps involved:
- Setting up the app on your account.
- Integrating Google’s API into your app.
- Comprehensive testing before making your app available to the general public.
We’ll tackle each of these in bite-sized chunks – though some are a bit chunkier than others. So, without further ado, let’s make our way to the deep end!
1. Create or Log into Your Google Account
Most everyone already has a Google account, so for the first step, you need to login to your account at https://play.google.com/apps/publish/. If you aren’t already logged in, Google will ask you to login or create a Google account. Once you have done so, hit that link again and you should see:
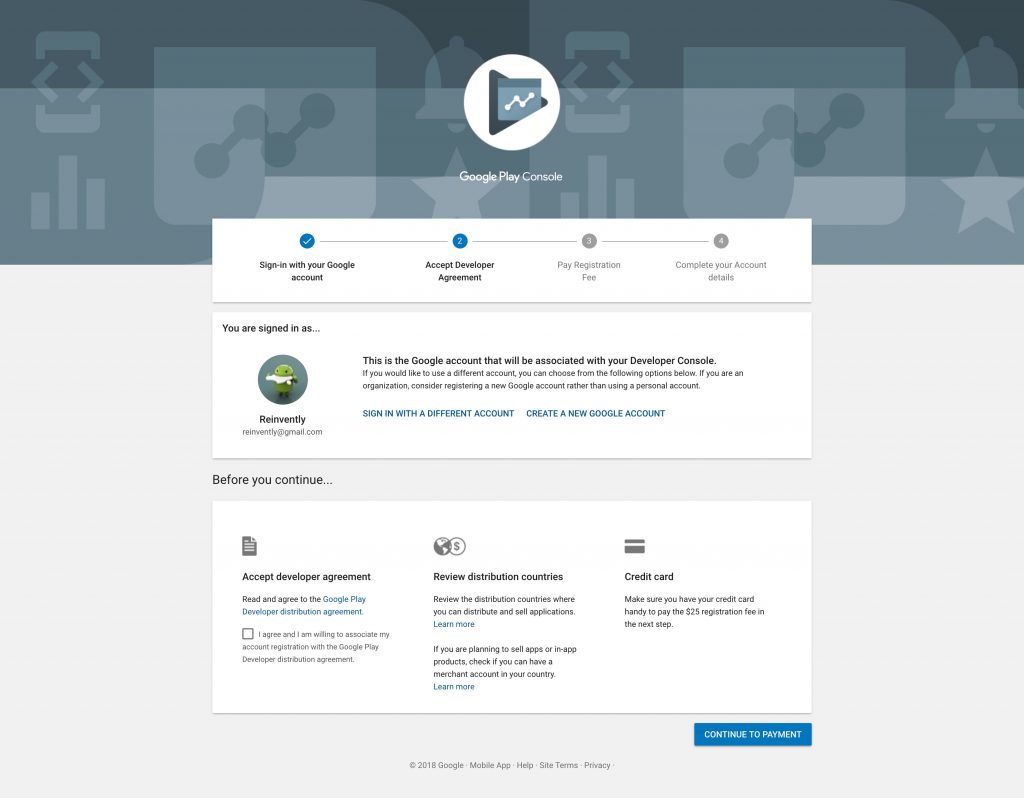
If you have more than one Google account, verify that you are signed in with the account you want to use to add an app to Google Play. That’s especially important if you work for a company with an account dedicated to registering apps – and if you already paid the $25 registration fee.
It’s always a very good idea to read the Google Play Developer distribution agreement before checking the box that you agree to it.
If you intend to promote your app internationally, reviewing distribution countries brings you to a table showing currency, price ranges and limitations on a per country basis.
Finally, if you don’t have a publisher account, make sure to have your payment info ready and proceed to make the payment. That will generate a pop-up asking for your credit card number, year and month expiration date, 3-digit Card Verification Code, cardholder name and billing address.
Congratulations, you can now publish apps on Google Play!
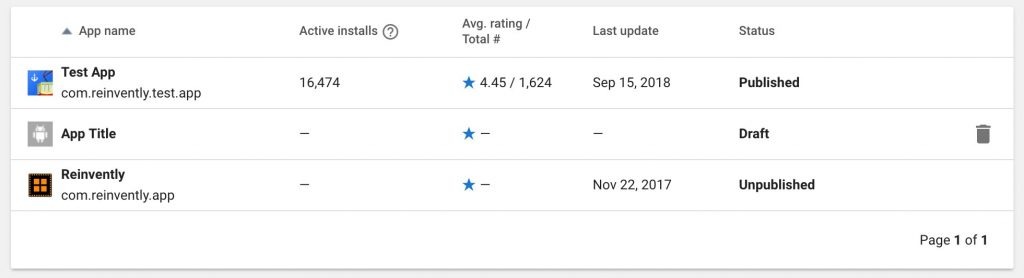
2. Google Play Console: Your Applications
If you haven’t published an app before, this screen will be empty aside from the option to CREATE APPLICATION. If you have published before, then you will get a list of apps published and summary information about their number of active installs, average rating, last update and current status.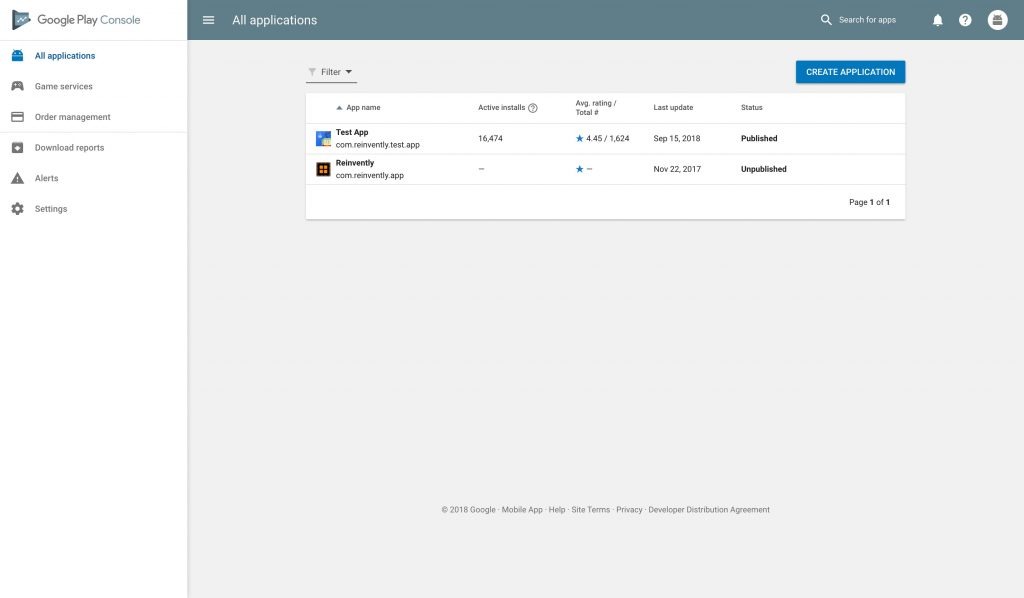
If you have all of the prerequisites itemized earlier, go ahead and click CREATE APPLICATION.
3. Default Language and App Title
For the Default Language, English (en-US) is best to use for your default language – especially if you are focusing on the US market.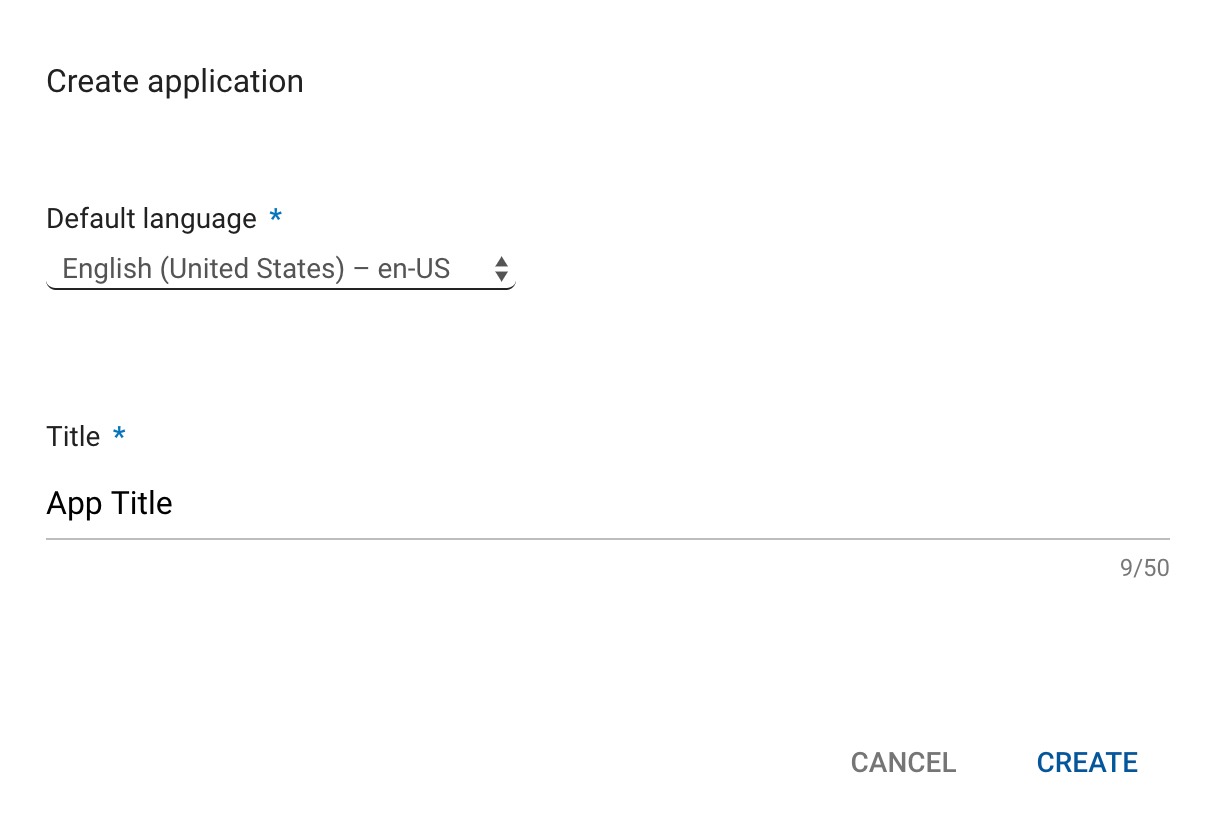
For the App Title, you only have 50 characters. It is the name of your app – and is what end-users will see when browsing across Google Play.
After entering your App Title, click CREATE to continue.
4. App Title and Descriptions
Your App Title should be the same as you entered in the previous step, but if you like you can change it here. A lot of thinking should go into your app’s name. Do your best to make it easy to remember, distinctive, and unique – with a name that’s closely relevant to what it does or that associates easily with your brand.
You’ll want to do some keyword research for the sake of App Store Optimization for all elements involved in this step. What words would your audience use to find your app? ASO should be considered a continuous activity with constant A/B testing to hone in on the keywords that get your app the most visibility.
Your Short Description is limited to 80 characters. As Gummicube noted in the link above,
“Google scrapes your description to understand what the app is about, and what it should subsequently rank for. This means that the words you use in the short and long description play a crucial role in app store visibility.”
The Full Description gives you a full 4,000 characters to play with. This area tends to get a lot of misuse and abuse. Gummicube again provides a lot of good advice:
Using lengthy blocks of text on the App Store will turn users away with a sigh of “too long, didn’t read.” On Google Play, writing a description that doesn’t properly utilize the app’s keywords will prevent it from indexing properly, ensuring few users will see it in the first place. Each description must be written with care, paying close attention to the store it’s written for.
Explain the app’s features and benefits. Utilize lists and bullet points to provide the information in a quick and easy to understand manner. Ensure that the description is written well, is informative and formatted to each store.
5. Graphic Assets

Google Play offers you a lot of options to showcase your app with pictures and even videos. Do your best to provide graphics for each option to which your app is suited.
Mandatory:
- A 512 x 512, 32-bit PNG icon. Graphically speaking, a professional icon is likely to get more people to look at your app than any other element. It is the first visual representation of your app people browsing Google Play are likely to see.
- Two screenshots are required – the Featured Graphic and Promotional Graphic.
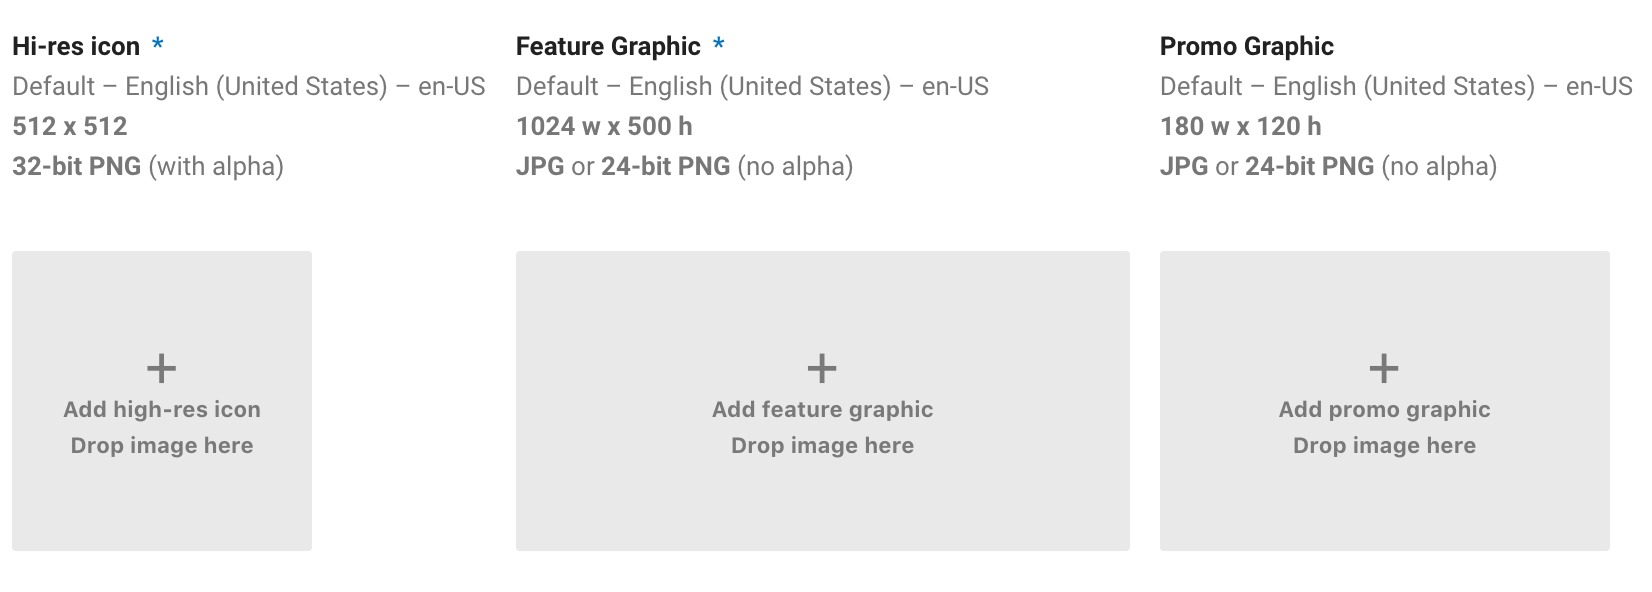 You can also have up to 8 screenshots per device type:

Plus a TV Banner and a Daydream 360 stereoscopic image.
The more you can provide, the better. Again, Gummicube provides us with more good advice for getting the most out of your creatives:
Every screenshot is a chance to demonstrate the app’s value and should showcase another feature or function. Include callout text that highlights the features, so users can understand the full value. What this entails will vary from app to app, such as mobile games showing gameplay and graphics or shopping apps showing the ease of use and variety of things to buy. Regardless of the app, the creatives are key to selling it.
Also, don’t ignore the promotional video section, just below:
If you have an eye-catching, well-produced video, it can make all of the difference.
6. App Categorization
This step takes us back to some easier questions. Is your product an application or a game?
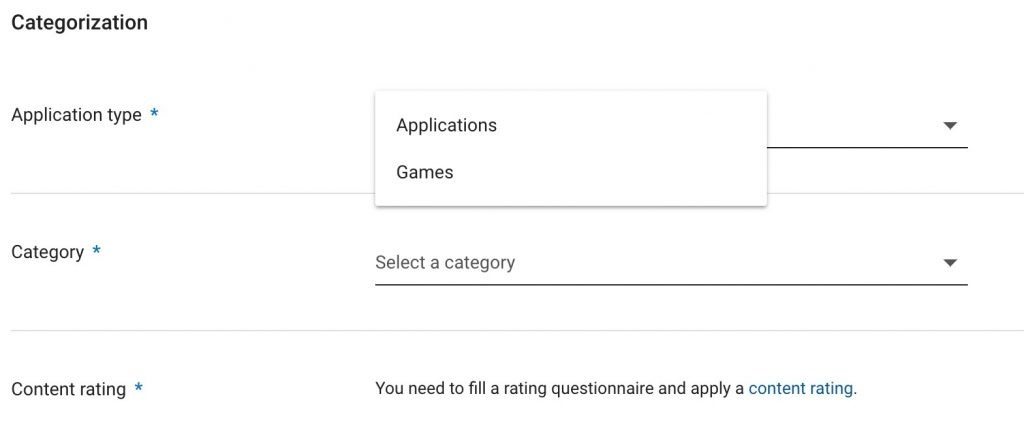
Your app’s Category may take more thought as there are quite a few broad categories ranging from Art & Design to Communications, Dating, Entertainment and more. If you have any questions here, it is worth browsing through the different categories on Google Play to see which categories have apps that are similar to yours.
The Content Rating Questionnaire can only be accessed at this stage. You can find additional guidance about the questionnaire, the rating authorities, how your answers will be used, and how you may appeal a rating from Google’s Support.
7. Add Your Contact Details
The last section of this very long form should be stuff you already know – your website, email address, phone, and a link to your privacy policy.
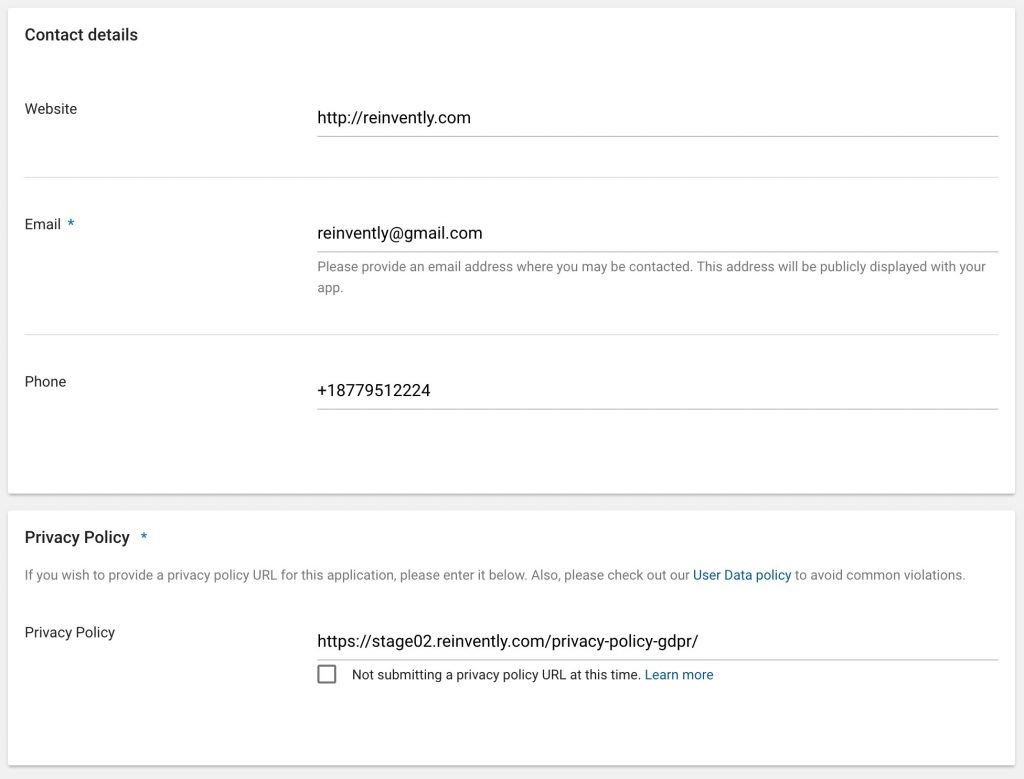
If you have any questions on the matter, check out Google’s latest privacy policy guidance. A privacy policy is required to publish your app on Google Play, answering the following three questions at a minimum:
- What information do you collect?
- How do you use the information?
- What information do you share?
Note, however, you can click the box to indicate that you don’t have a privacy policy at present, so you can still proceed to SAVE DRAFT. Doing so should return you to a familiar looking screen…
8. Google Play Console: Your App’s Been Added!
Now, you’ll see your newest creation added to your Google Play Console. Before we just had two on our test account, and now we have three!
9. Testing and Production
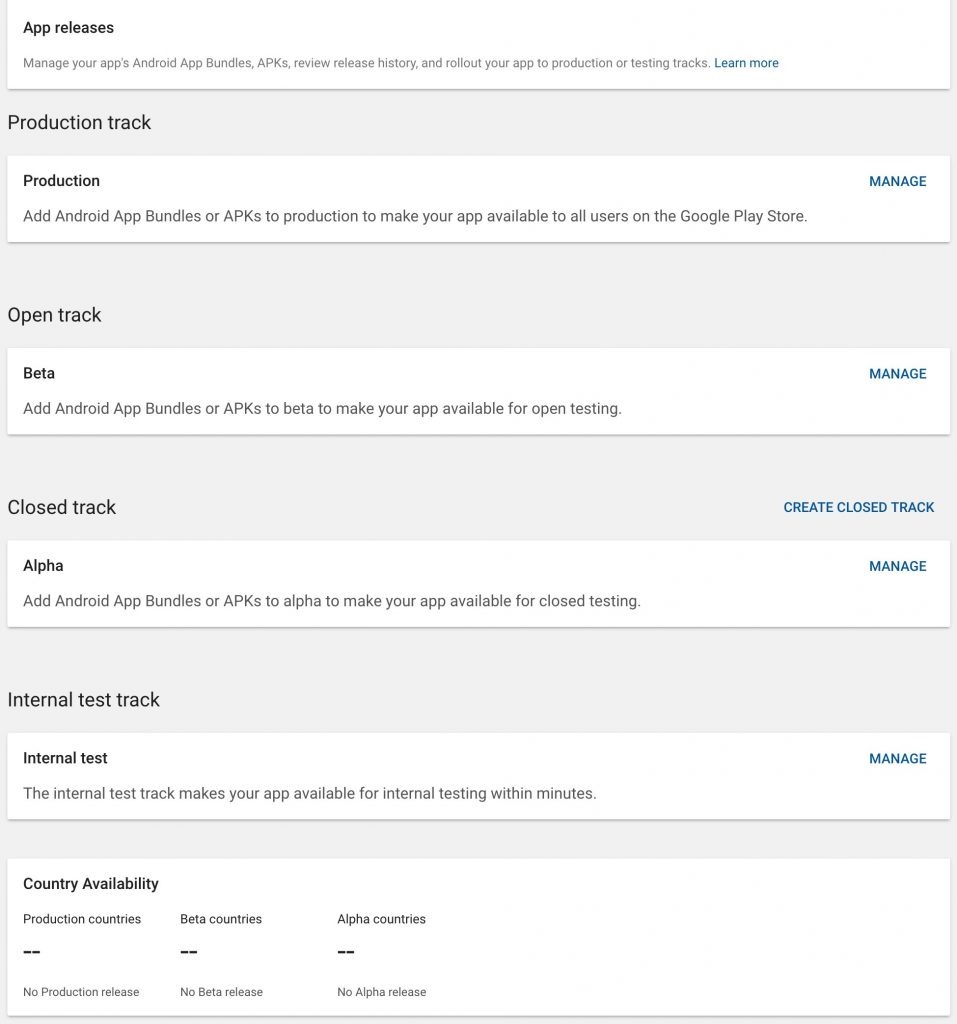
While quite a long form, this page helps you manage the testing of your app up through its final production and release to the Google Play Store. The flow is not quite intuitive, as the testing to production sequence starts at the bottom and works its way up through potentially four steps:
- Internal Testing – testing is limited to the testers on your team only.
- Alpha Testing – testing is opened up to a pool of testers that you designate, may include clients.
- Beta Testing – your app is available to the public for testing, a means of getting maximum feedback from users who know there’s a high likelihood of bugs and won’t judge you to harshly for them.
- Production – your app is published to the store and people can download it and/or buy it expecting a high-quality release.
The process is more or less the same across all four tracks. To proceed, just click on the track you want to manage.
10. App Signing by Google Play
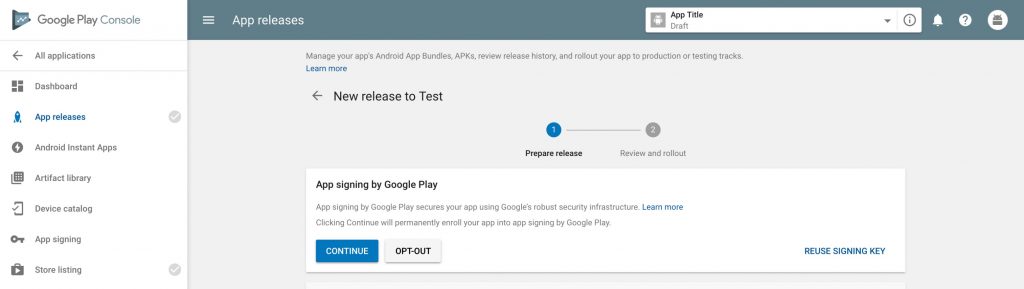
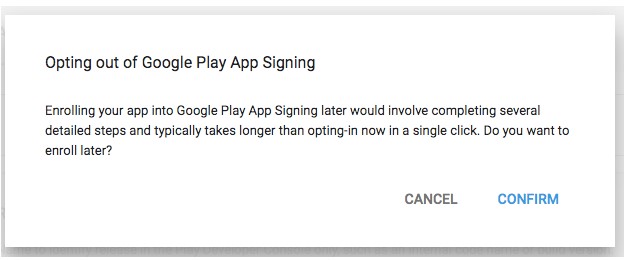
Here, you’ll need to decide whether you want to use Google to sign and manage your APK or app bundle or rely upon an alternative approach. All Android apps are signed with a key to help verify their integrity and that any updates come from the owner of the key. It is important to review Google’s terms and conditions, as the decision is effectively permanent. If that sounds scary, you can opt out. The caveat is that if you change your mind later, you’ll receive the following message:
It’s an important decision. The following links provide more details on different aspects you might want to consider:
- How App Signing by Google Play Works
- App Signing by Google Play for Android Developers
- Securing and Optimizing Your App with Google Play App Signing by Abayomi Akanji
- Android Security: Adding Tampering Detection to Your App by Scott Alexander-Bown
11. App Bundles and APK’s
In this step, you only need to upload your APK file (.apk). If you are not a developer or not used to working with .apk files, checkout Tim Fisher’s What Is an APK File? How to open, edit, and convert APK files. At the same time as you add a new APK, you’ll probably want to deactivate any older ones you no longer wish to support and/or keep certain ones active for older devices.
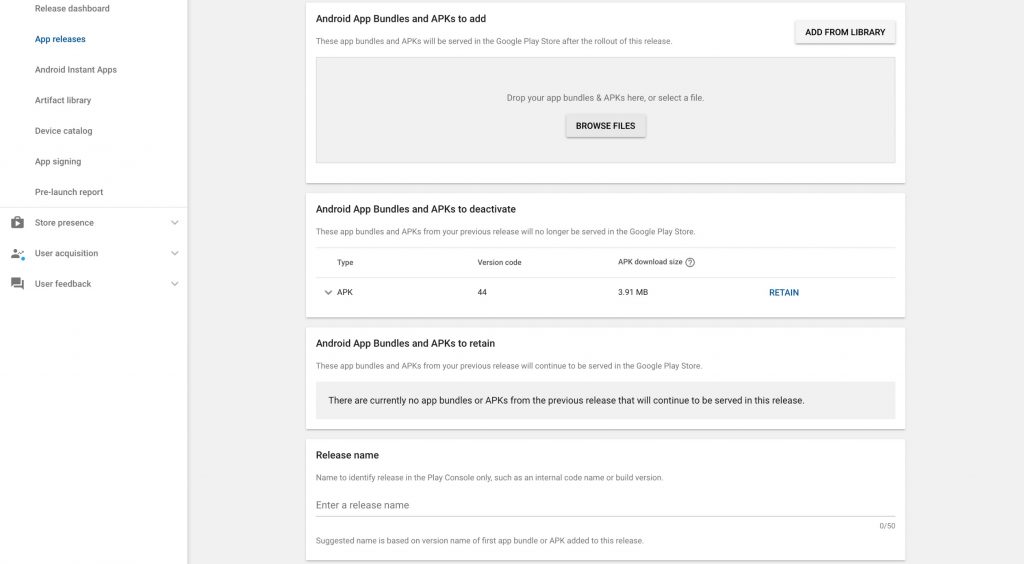
For the last field, Release Name, most developers use the release version like 1.0, 3.11, etc.
12. Release Notes or What’s New?
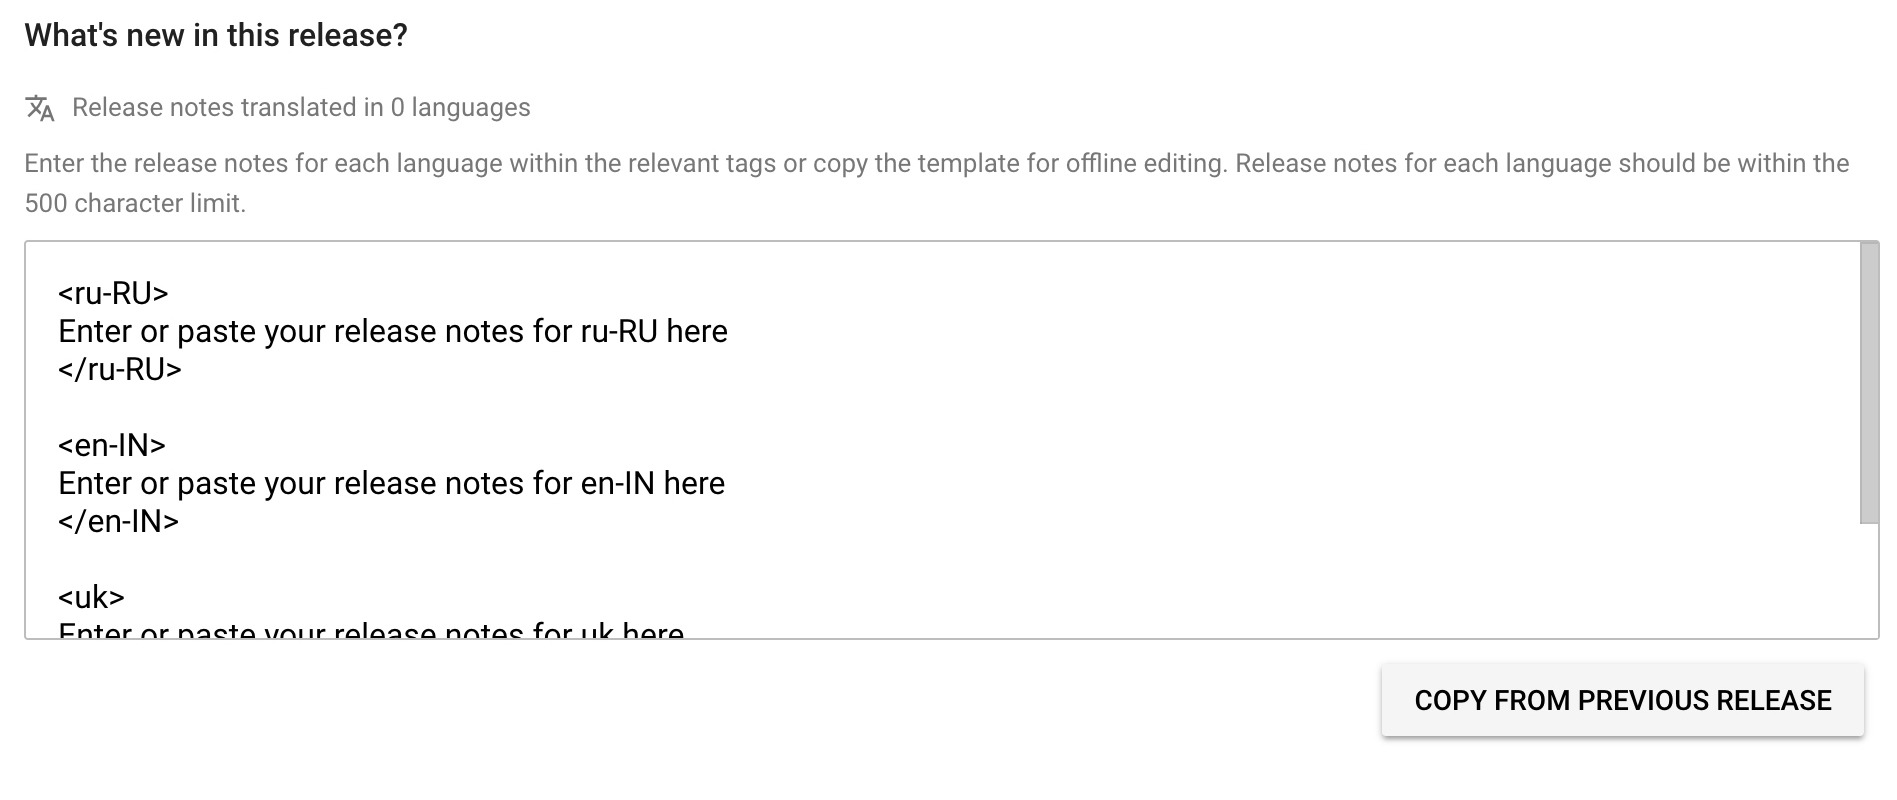
After managing your APK files, you are brought to the last part of this form which tells users what’s new about this version. This should only be the most recent changes in your Changelog. This allows for only 500 characters. If you are producing in multiple languages, make sure to include translations for each using the language tag template.
13. Rolling it Out – Publishing to the Google Play Store
As noted before, the steps for internal, alpha testing, beta testing and final release to the Google Play Store are very similar. As each test is completed, you can push it to the next track. For example, if you’re done with internal testing like this screen shows, you get a final review before you push it to alpha testing. It helps you to review, and fix any warnings.
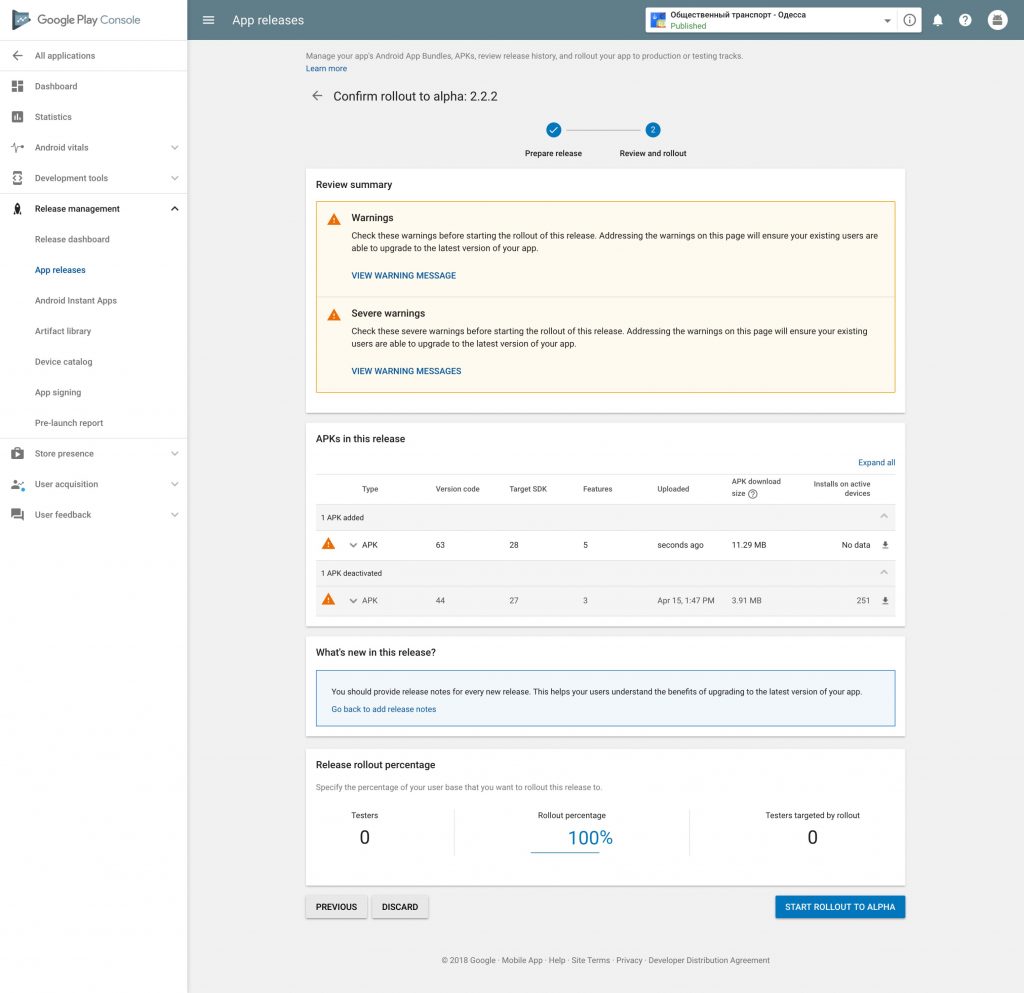
If you’ve finished all of your testing and you are confident that are ready to release a high-quality product, then you’ll see the last blue button. Instead of “start rollout to Alpha” you’ll see “start rollout to Production.” When you push that, you’re publishing it to the Google Play Store and millions of Android users will finally have access to your app.
You’ve Only Just Begun…
Congratulations! But that’s all just the start of your app’s journey to success. You’ll want to continuously improve your app, working on micro-design, improving metric performance to boost your ROI and adding features to keep up with your competition.
One you’ve published though, other members of your team can get involved in supporting its marketing and distribution. You don’t want to stop with having your app on Google Play – you want to get it in as many other app stores as you can. There you can make like a big fish in a small pond by leveraging one store’s top app lists to get into others. You’ll want to continue working on your App Store Optimization as well as SEO for your company site. Then there’s social networking and advertising and… on and on it goes.
Even the longest journey begins with a single step.


 (3 votes, average: 3.67 out of 5)


Leave a Reply